Renting a self storage unit is a smart way to clear clutter, store seasonal items, or create extra space when moving or downsizing. However, the key to truly benefiting from a storage unit lies in how well you organize it. An organized unit doesn’t just save you space—it also saves you time, frustration, and even money in the long run.
Think about the last time you needed something you put in storage. Did you find it in minutes or spend an hour digging through boxes? With a little planning and a few proven strategies, your storage unit can become an efficient, accessible space instead of a disorganized pile of unknowns.
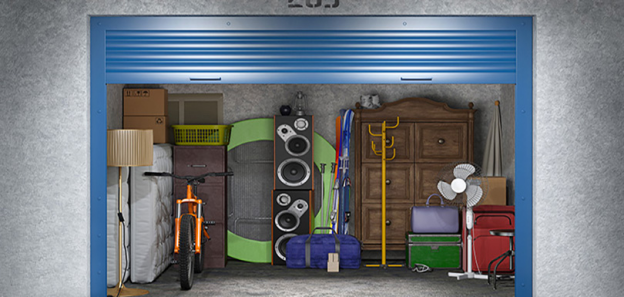
Whether you’re renting a unit short-term or plan to store long-term, here’s how to set yourself up for success:
1. Plan Ahead Before You Pack
Before you even pack a single box, create a plan. Start by taking inventory of what you plan to store. This gives you a clearer idea of how much space you need and allows you to group similar items together. It also helps to sketch a rough layout or use an app like Sortly or MyStuff2 to digitally organize and catalog your belongings.
Make sure to group items based on frequency of use, fragility, and category (e.g., kitchen, holiday décor, business supplies). This foresight will make accessing what you need much easier down the road.
2. Label Everything Clearly
Every box, bin, or bag should have a visible label on at least two sides. Use large, legible writing or printed labels. Go beyond “Miscellaneous” or “Bedroom” labels—instead, list a few key items inside each box (e.g., “Winter Coats, Snow Boots, Gloves”).
For even more clarity, consider color-coding labels by category: red for holiday items, blue for winter gear, green for sports equipment, etc.
Pro Tip: Use waterproof labels or cover paper labels with clear packing tape to keep them readable in damp or humid conditions.
3. Use Uniform, Stackable Boxes
Choose boxes of similar sizes and shapes for easier stacking. Uniformity increases stability and maximizes vertical space. Avoid using oversized or weak boxes that might collapse under weight or be difficult to move.
Heavy-duty plastic bins with lids are ideal for long-term storage, especially in non-climate-controlled units. They're durable, stackable, and offer better protection against pests and moisture.
4. Create Aisles and Leave a Path
When organizing your unit, don’t just fill it from back to front. Leave a small walkway—at least one clear aisle down the middle or side—so you can access the back without having to move everything out. Place frequently used items closer to the front and seasonal or rarely needed items toward the back.
Use shelves or pallets to lift items off the floor and prevent water damage or pest intrusion.
5. Maximize Vertical Space
Think vertical! Stack boxes to the ceiling if possible, but always put heavier boxes on the bottom and lighter ones on top. You can also add freestanding metal or plastic shelving units to hold small items, fragile goods, or irregularly shaped objects.
Tall items like floor lamps, skis, or garden tools can be placed upright in corners to save floor space.
6. Use Clear Bins for Important or Frequently Accessed Items
While cardboard boxes are cost-effective, using clear plastic bins for priority items makes them easier to find. This is especially helpful for things you may retrieve often, like business inventory, craft supplies, or kids’ clothes.
Consider labeling these with bold text and placing them toward the front of your unit.
7. Disassemble Furniture When Possible
Break down beds, tables, and other large furniture to save space and prevent damage. Store bolts and screws in labeled plastic bags and tape them to the furniture or place them in a dedicated hardware box.
Wrap furniture in blankets or protective covers to reduce dust buildup and scratches. Use vertical storage for headboards, bed frames, and tabletops whenever possible.
8. Protect Fragile Items
Wrap delicate items in bubble wrap, packing paper, or foam before boxing them up. Mark these boxes clearly as “FRAGILE” and avoid placing heavy items on top.
Stack fragile boxes higher up on shelves or in corners where they won’t be jostled as much.
9. Keep a Storage Map or Inventory Sheet
Place a laminated copy of your unit’s layout and an inventory sheet near the front or on the inside of the unit’s door. This way, you or anyone else accessing the unit can quickly find what’s inside and where it’s located.
There are digital tools for this too. Apps like Evernote or Google Sheets let you keep real-time updates you can access from anywhere.
10. Revisit and Reorganize Periodically
Your storage needs might change over time, so it’s a good idea to visit your unit every few months. Rotate seasonal items, check for water damage or pests, and reevaluate your layout as needed.
Maintaining organization is much easier than reorganizing from scratch, and it ensures nothing important gets buried or forgotten.
Final Thoughts
Organizing your self storage unit doesn’t have to be a daunting task. With some planning, labeling, and smart use of space, you’ll create a functional and stress-free storage solution. The extra effort now means fewer headaches later—especially when you need to quickly locate that one item you swore you put “somewhere in the back.”